
The handlebars are one of the most important choices in a bike build, as it is one of the key connections between the rider's body and the bicycle. Not only is it responsible for steering, braking and gear change but also it determines the riding posture and plays a large part in comfort and fatigue. I had already decided that I wanted Porteur style bars with a low rise. Originally I had purchased some bartape which emulated a perforated leather, however I found that it was a little too padded and I didn't like the feel. So I went back to an old friend, shellaced cotton tape. The advantages of this method are many, it is very grippy, very hard wearing and you can re-coat it with shellac to renew the finish. The only downside is that it has very little padding, however I personally prefer this feel over a thick padded bar tape.
As I've done this several times already with Mr Ramen I thought it'd be a good idea to go through step by step as a guide:
The first step is to get some cotton tape, you don't need to get cotton tape specifically for bikes. I usually use a 20mm wide herringbone pattern cotton tape, this is also known as apron tape in the UK. I combine this with some double sided tape to get it to stick to the handlebars which makes the wrapping process a lot easier. I usually get about 2m of each colour per side of handlebar to be safe.

2. Folding the starting end
This is a crucial part of getting it to wrap consistently, I would recommend starting both left and right sides of the handlebars before wrapping to get them as mirrored pairs of each other. First put some double sided tape on the ends of the tape. Then wrap the tape around the bar once, and then mark off the point where it makes one circumference.

From this point fold it over at an angle and then lay that piece onto the second part of tape with the sticky side facing up like the picture below.

Then fold over the outer layer as in the picture below, there should be no visible edges ideally on the top side. I would recommend doing the tape meant for the opposite side of the handlebars at the same time so you can get them exactly the same. The distance where the fold starts determines the length of the diamond in the harlequin pattern so it is important to get it right as well as consistent from the left to the right side.


3. Wrapping
I normally also cover the bars with double sided tape first if the tape I'm using isn't already adhesive backed. Start at the tops of the bars and wrap the upper tape around (yellow), lifting the lower one (red) to allow it to pass and then folding it back over.

Now take the red tape and wrap it the other direction, lifting the yellow tape so the red tape can pass underneath.

Repeat this process until you get the hang of it, trying not to overlap the tape otherwise you will get sharp ridges which can cause you to put pressure points on your hands when riding.

Concentrate on getting no gaps between each loop and folding over, paying attention to getting a consistent point where the two tapes intersect.

After continuing for a few loops you should start to see the pattern emerging.

Attachments to the bars such as shifters or brake levers are handled in much the same way as with normal tape, cut off a small piece to cover any gaps. Pay attention to keeping the intersections along the same part of the bar. After several hours of wrapping, unwrapping and rewrapping I finally got to the point where I was satisfied with the pattern. It takes a lot of patience to get the intersections consistent so you have two rows of alternating diamonds on each side consistently lined up. My advice is to take your time and practice, practice and practice!

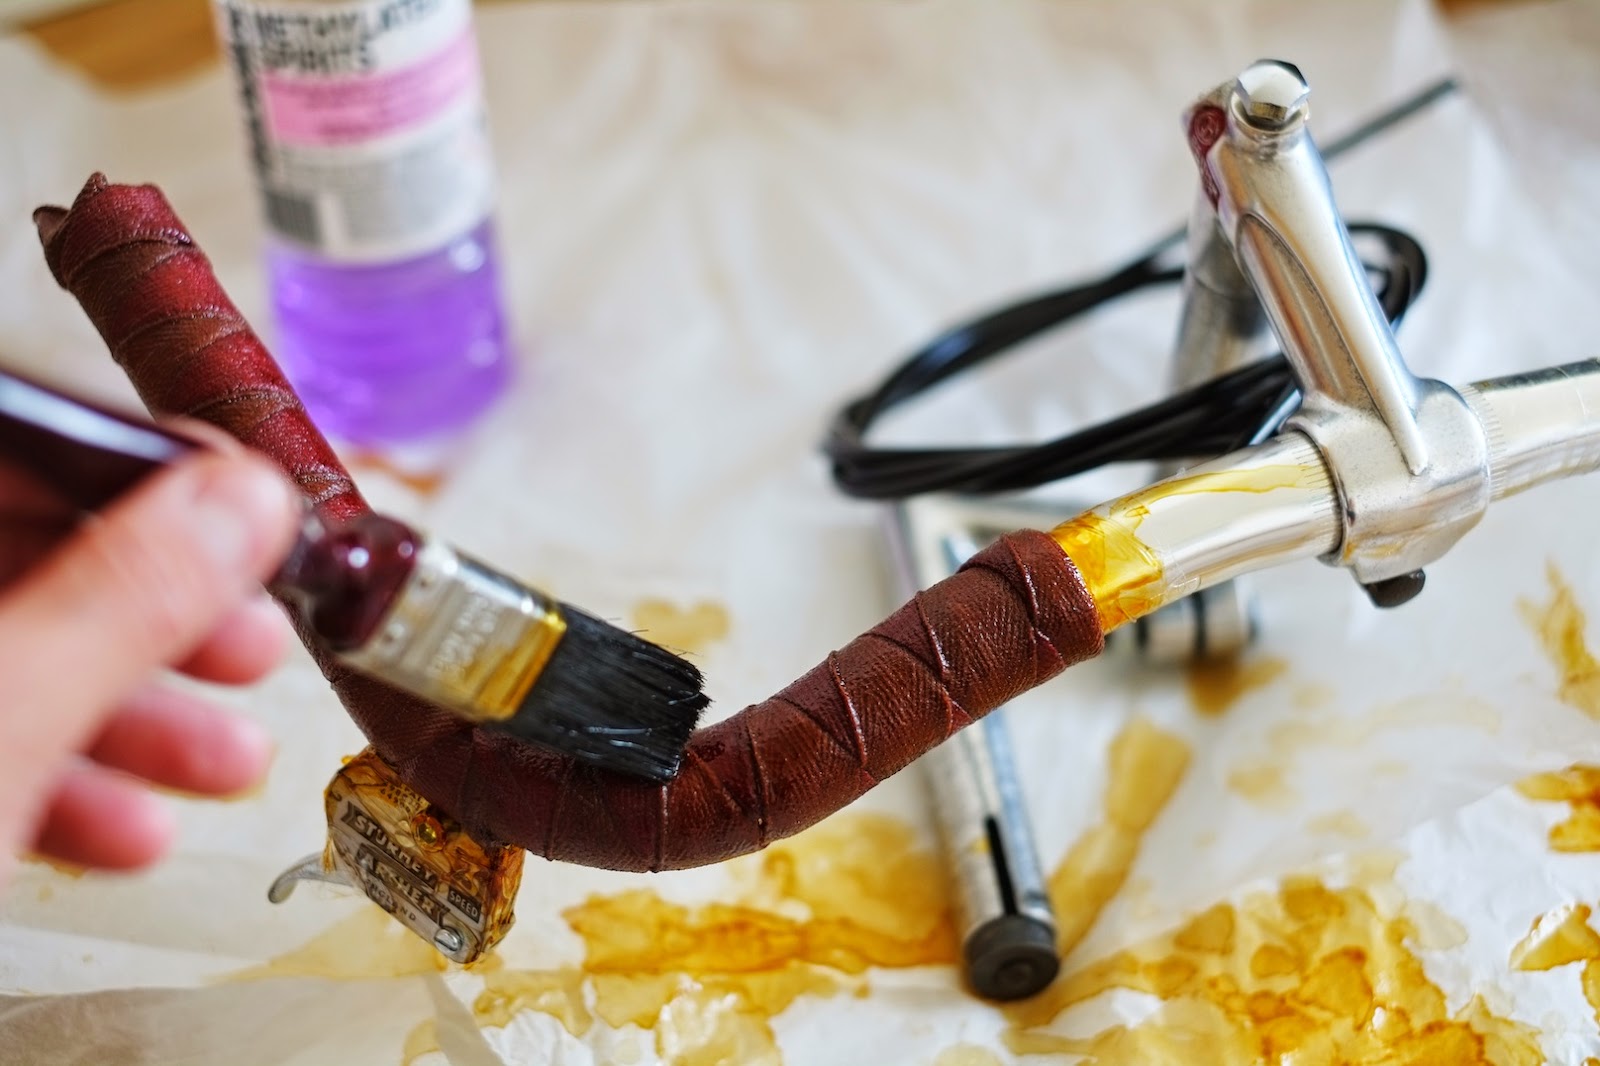
4. Lacquering
I have normally used shellac for this part, you can get it in two forms, premixed or in flakes and in a variety of colours. I would recommend getting it in flakes and mixing a fresh batch with methylated sprits every time, premixed shellac simply isn't as good. Also I would advise also doing a few test runs on tape off-cuts to see the resulting colour, typically shellac is a light brown colour but you can get it in clear and various shades of brown. Remember lighter tape colours will be more susceptible to going darker, you are basically dyeing fabric brown. The shellac I have used is a dark brown, the yellow tape turns into a caramel brown and the red turns into a mahogany type colour
Remember to mask off the tops of the bars with some tape and to leave enough extra length at the ends.

Firstly apply a liberal amount to the tape to allow it to soak in, make sure you get it on every surface of the tape as any bits which are uncovered will really stand out. Allow at least an hour or preferably more before the second coat.
Apply a second coat and continue reapplying coats allowing at least an hour between until the tape develops a shiny finish, this is when the tape is saturated and the shellac starts to create a varnish on the surface. Allow it to dry overnight before touching it. At this point you should have a nice glossy finished handlebar tape which is waterproof, hardwearing and grippy. It will develop a patina over time and will probably take on a few bumps and scratches through normal usage, at which point you can re-coat it again which will renew the finish like new. Enjoy your handlebars, and thanks for reading.


Cool, thanks!
ReplyDelete